
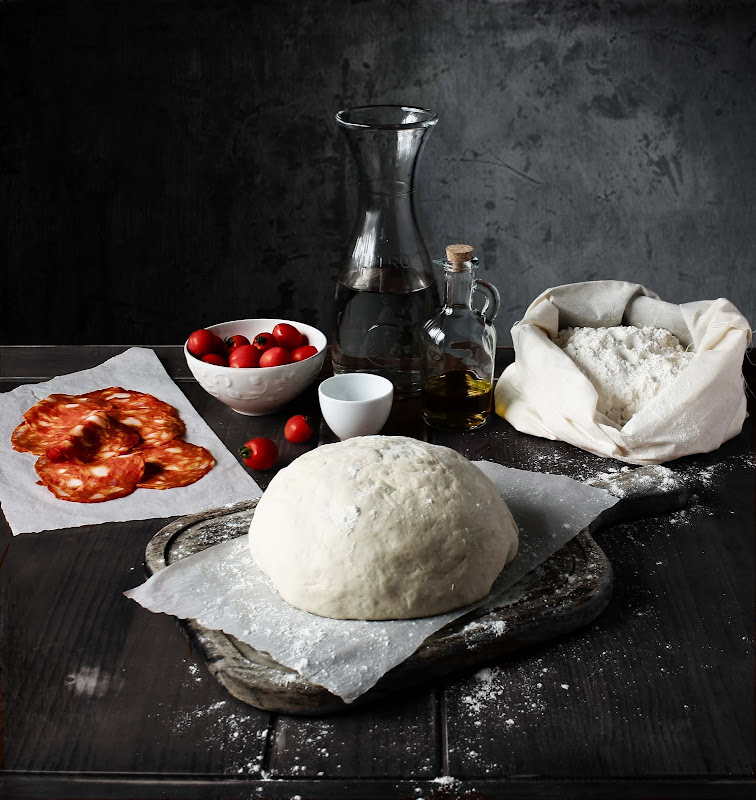
Depois de ter prometido aos meus filhos um Domingo de pizza, passei o dia de ontem em modo de mama italiana. Avental, parafernália a postos, farinha a voar em gestos destemidos… E depois de amassar, esticar e puxar, finalmente, massa!
Há alguns anos atrás, encontrei a receita perfeita de massa de pizza (do Jamie oliver). Fácil, poucos ingredientes, daqueles que se encontram sempre em qualquer cozinha. Gostei tanto que fiquei com ela até hoje. E uma das coisas que mais gosto nela, é o sair sempre bem, mesmo quando nem sequer espero que ela levede, o que acontece quase sempre. Eu sou uma rapariga impaciente! Mas caso o queiram fazer, basta que tapem com um pano e a deixem num canto da cozinha ameno e sem correntes de ar, até que dobre de volume (entre 1 a 2 horas).
O único senão é a confusão farinhenta que se instala, o que numa cozinha pequena se nota muito mais. Mas apesar disso, fico sempre agradavelmente surpreendida com a rapidez de todo o processo, desde o descontrair do fazer da massa, passando pela diversão da escolha dos recheios, ao gosto de cada um e acabando no tempo de cozedura.
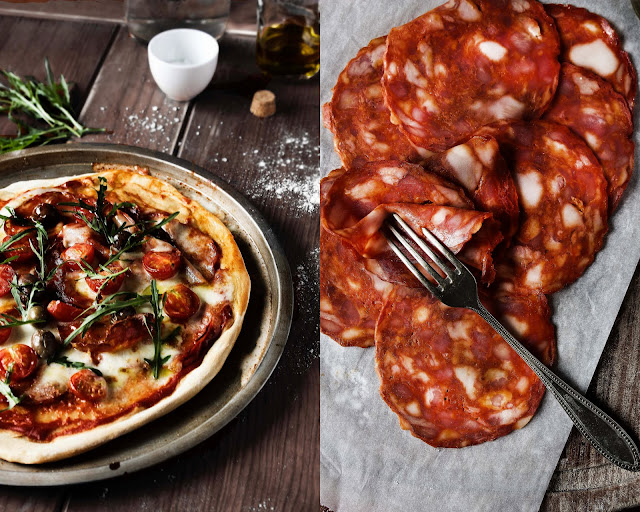
Desta vez o recheio foi decidido pelo João P, ao gosto dele e tendo em conta o que havia disponível no frigorífico. A rúcula foi apanhada no último minuto na horta, claro!
Por fim, cabámos todos à mesa para um almoço tardio de pizza. E embora já o soubesse, volto a dizê-lo: Esta é sem dúvida uma das melhores formas de passar um Domingo em família :))
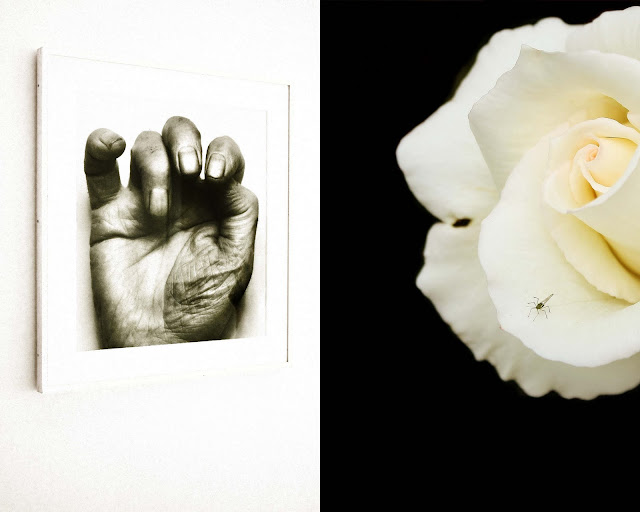
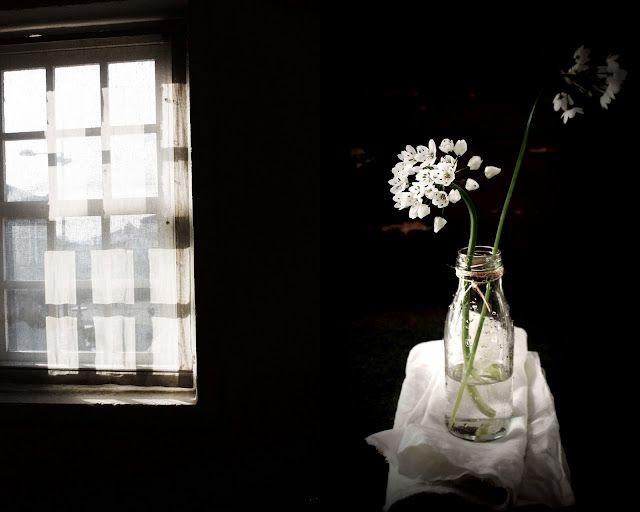
Durante a semana passada revi algumas fotografias, do meu arquivo em expansão e decidi publicar algumas hoje. São imagens de uma exposição, de um velho prédio do Porto que fotografei há algum tempo, do meu jardim e do estúdio e são também algumas das minhas fotos preferidas.
M :))
In english
After promissing my boys a pizza Sunday, yesterday I spent the day in italian mama mode. Apron, paraphernalia standing by, flour flying in fearless gestures… And after kneading, stretching and pulling, finally, bread dough!
Some years ago, I came across the perfect pizza dough recipe (from Jamie Oliver). Easy, only a few ingredients, the kind you always find in every single kitchen. It makes a soft center and crispy edges kind of pizza. I liked it so much that I stuck to it until today. And one of the many things I love about it, is that it always comes out right, even when I use the dough straight away, without waiting for it to rise, what happens almost every ntime I make pizza… What can I say, I´m an impatient kind a girl! But if you prefer to do it, just cover the dough with a warm kitchen cloth and leave it in a warm, draft free spot of your kitchen, until it doubles in size (about 1 to 2 hours).
The only drawback is the installed floury mess, which is hard to avoid in a small kitchen like mine. But despite this, I´m always pleasantly surprised at how fast the entire process is, from the relaxing making of the dough, to the fun choosing of the toppings, and finally the baking time.
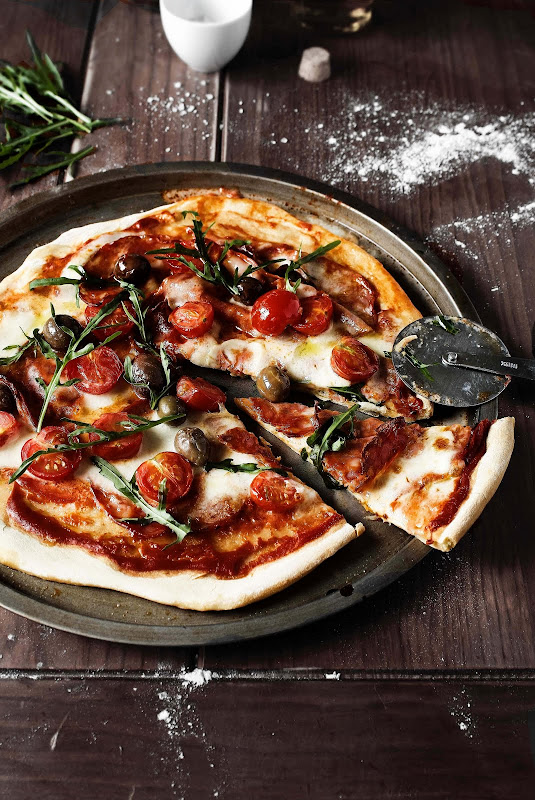
This time João decided the topping, regarding the ingredients we had in the fridge. The arugula was freshly picked at the last minute. from the kitchen garden.
Finally, we all gathered around the table for a late lunch of pizza. And although I already know it, I will say it again: This is one of the best ways of enjoying a Sunday with the family :))
During this past week, I reviewed some of my photos from the ever growing archive and decided to post some of them today. They are images of an exhibition, an old building in Porto that I shoot awhile ago, from my garden and from my studio.
xo :))
Ingredientes:2 pizzas finas e grandes
500g de farinha
1 colher de sopa de fermento desidratado
1/2 colher de chá de sal
1/2 colher de chá de açúcar
2,5 a 3 dl de água morna
Farinha para polvilhar
Recheio:
Molho de tomate caseiro – Aqui está uma receita deliciosa de um dos meus molhos de tomate caseiros
2 bolas de mozzarella fresco
Tomates cereja
Fatias de chourição
Azeitonas (usei alentejanas com oregãos)
Rúcula
Azeite frutado
Preparação:
*Numa taça coloque a farinha, o fermento, o açúcar e o sal. Faça uma cova e vá juntando água aos poucos, enquanto mexe com uma colher ou grafo.
*Junte água até a massa ligar e depois amasse com as mãos em cima de um balcão polvilhado com farinha.
*Estique a massa para a frente e puxe-a para si, várias vezes até a massa ficar elástica, cerca de 5 minutos.
*Faça uma bola com a massa e depois, estique-a de forma a que fique como um rolo espesso.
*Corte de seguida em 2 pedaços iguais (sem deixar levedar) e estenda. Se não ficar redonda não há problema, eu pessoalmente até gosto das pizzas com aspeto irregular e rústico.
*Pré aqueça o forno a 220º, marca 8 ou no máximo do fogão a gás.
*Coloque os discos de massa nos tabuleiros onde vão ao forno e espalhe molho de tomate na superfície de cada uma das pizzas, deixando um rebordo estreito a toda a volta que ao cozer vai tufar ligeiramente.
*Cubra com fatias de chourição, os tomates cortados ao meio, as azeitonas e o queijo esfarrapado em pedaços à mão, não com a faca.
*Coza no forno por 10 a 12 minutos .
*Ao cozer o mozzarella vai derreter e ficar bastante líquido, por isso tenha cuidado ao retirar do forno para que o recheio não deslize.
*Ao arrefecer o queijo fica mais espesso novamente.
*Espalhe folhas de rúcula fresca e um fio de azeite frutado por cima da pizza e sirva.
*Se preferir pode usar apenas uma base de pizza e congelar a outra num tabuleiro, entre duas folhas de papel de alumínio. Depois é só deixar descongelar sem tirar a base de cima do papel, rechear e levar ao forno.
Ingredients: 2 big thin pizzas
500g strong bread flour
1 tbs dried yeast
2,5 to 3 dl warm water
1/2 tsp salt
1/2 tsp sugar
Topping:
Homemade tomato sauce – Here you´ll find one of my delicious homemade tomato sauce recipes
Chourição slices (chourição is a large chouriço)
Cherry tomatoes
Olives cured with oregano from Alentejo, Portugal
Arugula leaves
Fruity olive oil
Preparation:
*Put the flour, yeast, sugar and salt in a big bowl, make a hole in the center and start adding water slowly, mixing with a spoon or fork until it starts to come together.
*Turn the dough onto a clean weel-floured surface and knead for at least 5 minutes, pressing the heels of your hand firmly, pushing it forward and back to you again, until it becomes elastic and smooth.
*Shape the dough into a ball and then into a large roll. Cut the roll in 2 and make 2 smaller balls.
*Roll each ball into a big disk, it doesn´t matter if you can´t make the perfect round pizza disc. I personally prefer my pizzas with a rustic look. You can also use your finger tips to stretch the dough to the shape you want.
*Put each dough disc into baking sheets (I don´t oil or dust my pizza baking trays, but if you prefer to do it, be my guest) and prepare the topping.
*Preheat the oven to 220º, 450º f , gas mark 8.
*First a layer of tomato sauce, but remember to leave a fine border all around to serve as a barrier for the topping ingredients. Then some chourição slices, followed by the halved cherry tomatoes, olives and ripped (don´t cut it) mozzarella.
*Bake for 10 to 12 minutes, until golden brown and the cheese is bubbly.
*The mozzarella will be very runny and milky, so be carefull when you pull the pizzas out of the oven. Let it cool for a couple of minutes and it will firm up a bit
*Scatter some arugula leaves on top and serve with a drizzle of fruity olive oil
*If you prefer, you can freeze one of the pizza discs into a baking sheet, between 2 leaves of tin foil. Then all you have to do is defrost it without removing it from the bottom tin foil leaf, cover with the topping and bake.

Pizzaaa!! 😀
Quem não gosta?? É uma delicia 🙂
Adorei as fotos, a receita…tudo! Fiquei mesmo com a tentação de esticar o braço e tirar umas fatias 🙂
LikeLike
uiui adoro pizza essa esta super perfeita bravo bjs
LikeLike
já guardei a receita da tua massa=) aindanão encontrei nenhuma k possa dizer que é perfeita, assim que experimentar digo-te!! ADOREI AS TUAS FOTOGRAFIAS=)
LikeLike
Adoro vir espreitar as suas receitas, da gosto de experimentar, bem explicadas e fotografias lindas.
Obrigada amiga de partilhar.
Bjs
Esmeralda
LikeLike
Há muito tempo que ando em busca da receita de massa de piza perfeita e esta já está guardada e pronto a ser posta à prova!!
As fotografias deste blog são qualquer coisa de espetacular! Dá vontade de comer tudo! Parabéns!
Beijinhos,
Leonor
LikeLike
Stunning photos!!
LikeLike
Que bela sugestão para o jantar de logo à noite… e com estas deliciosas imagens, a minha barriga concorda!
LikeLike
Post lindo como sempre!
Ganhei uma pedra de pizza e acho que essa é uma ótima receita para inaugurá-la. 😉
LikeLike
Olá! a sua pizza ficou perfeita, estou ansiosa para prepara-la. Adorei as fotos, bjs:)
LikeLike
I heard about Jamie Oliver's pizza dough from another blogger. I think it's time I bake mine too and I have to agree with you.. this is best way to spend time with family at home 🙂
LikeLike
Que óptimo aspecto!
LikeLike
Esta receita não deve ser considerada vegetariana porque contém chourição.
LikeLike
Basta que deixe o chourição de lado Sandra.
LikeLike